spatchcocked slow-grilled chicken with crispy skin
I’ve never in my life performed the very normal ritual of roasting a whole chicken. It just never really occured to me as a thing someone like me would do. But as of summer 2022, we grill one of these bad boys every week. How did I become this person?
The answer: trial and error. Now I bring to you my definitive guide for insanely good, highly utilitarian, flexible, versatile, whole spatchcocked slow-grilled chicken with crispy MFing skin.
crispy skin alert
Whole slow-grilled chicken is extremely high reward for the amount of effort required. The average chicken makes an assortment of dinners and lunches throughout the week, the skin is crispy and rendered, and the meat itself is so fall-apart tender by the end of the grill time that you barely need to carve it (which is good, because I don’t really know how and mostly just tear at the bones like a cave person). The reason I don’t get bored of it despite making it every Sunday is that it just goes so well with so many things, particularly mid-day when I don’t have time to really think about it: chilled pasta salad or grain bowl components, whatever tangles of greens you have leftover in a salad spinner, cilantro-lime rice and remnant salsa (see photo), pita and hummus and Greek salad (see other photo), whatever. Literally everything goes with slow-grilled chicken. Let’s start from the beginning.
SPATCHWHAT?
Say it with me: s p a t c h c o c k . Spatchcock! Some people say this is the summer of tinned fish. This is my summer of spatchcock.
Spatchcocking, as you’ve probably heard, is a two-step technique designed to flatten a whole chicken. Step one is cutting out the backbone with kitchen shears. Step two is breaking the breastbone with one swift hit. I would give you instructions on how to do this, except I’ve never done it.
Why not? I just don’t really like dealing with raw chicken in the kitchen beyond seasoning it (see below), and am not confident in my ability to break the breastbone correctly without spraying chicken juice on myself. If you are like me, you can just ask for this to be done at the meat case, which gives you the option of keeping the organs and the backbone for yourself (the latter of which you can keep for stock or bone broth, which is more relevant to me in the winter than it is now) or leaving them at the store to be used for another purpose. The staff at Whole Foods is happy to deal with your spatchcocking needs for you. If you’re in doubt, ask! It has lowered my ability to make excuses not to make whole chicken substantially.
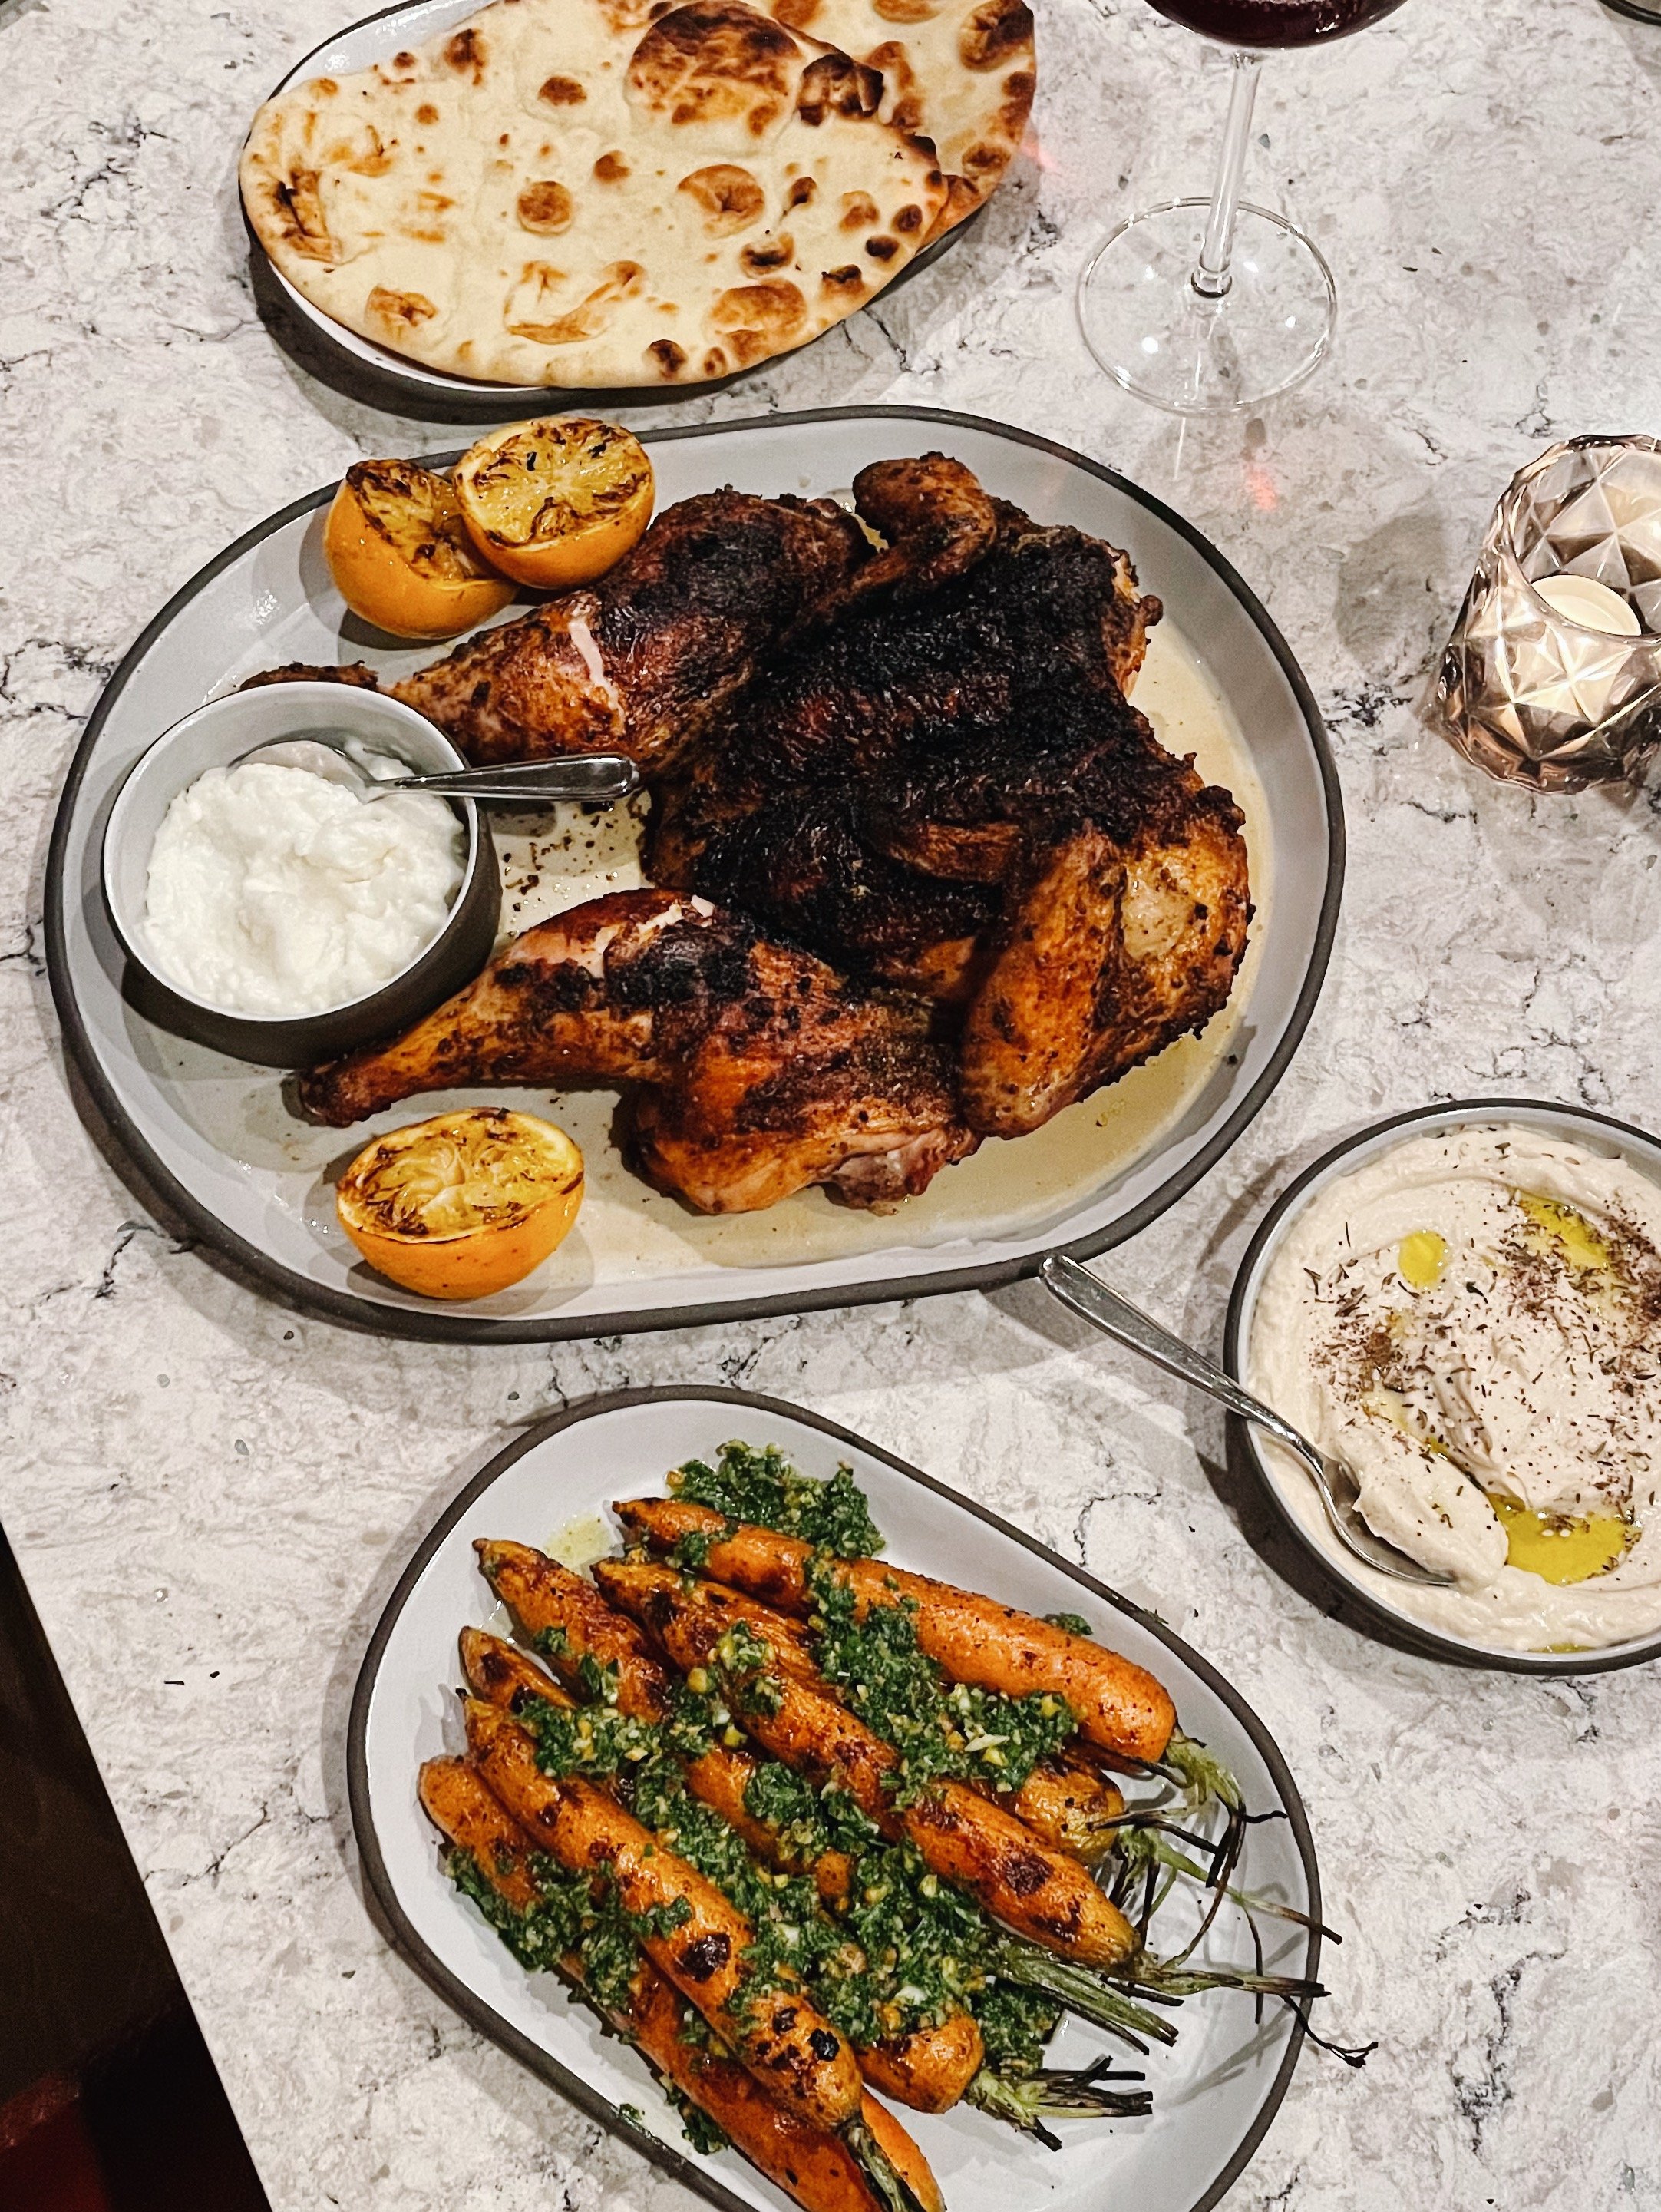
grilled lemons, flatbread, really good hummus, grilled carrots with pistachio carrot top pesto, garlic sauce
THE RUBDOWN
You can really season with anything you’ve got, as long as you start with salt. Salt that thing well and let it absorb while the chicken warms up a bit, which is a necessary step in this process if you want crispy skin. After that, my favorite spice to use is a Penzey’s blend called Turkish Seasoning, which despite its very specific name is a highly versatile blend of “garlic, cumin, Tellicherry black pepper, Turkish oregano, sweet paprika, sumac, cayenne red pepper and cilantro” that lends itself well not only to Turkish accoutrement, but to broad Mediterranean and Mexican inspired toppings thanks to a heavy overlap on the flavor profiles. You can also use your favorite cajun seasoning, BBQ rub, zaatar, or just plain old basic black pepper. The most important part is not the seasoning itself, but the zhuzhing of the seasoning: a really thorough massage of that stuff into the skin. Bond with it. This is, according to my friends, why my food tastes good—I really get in there.
The technique
While hands-off, I say “slow-grilled” because it does take awhile. This is how it works.
Let that bad boy come to room temp for about 30 minutes—it has to warm up first if you want the skin to crisp on high heat.
To help it warm up, give it a loving all-over rub with your favorite seasoning blend. You should hopefully have some inspiration now!
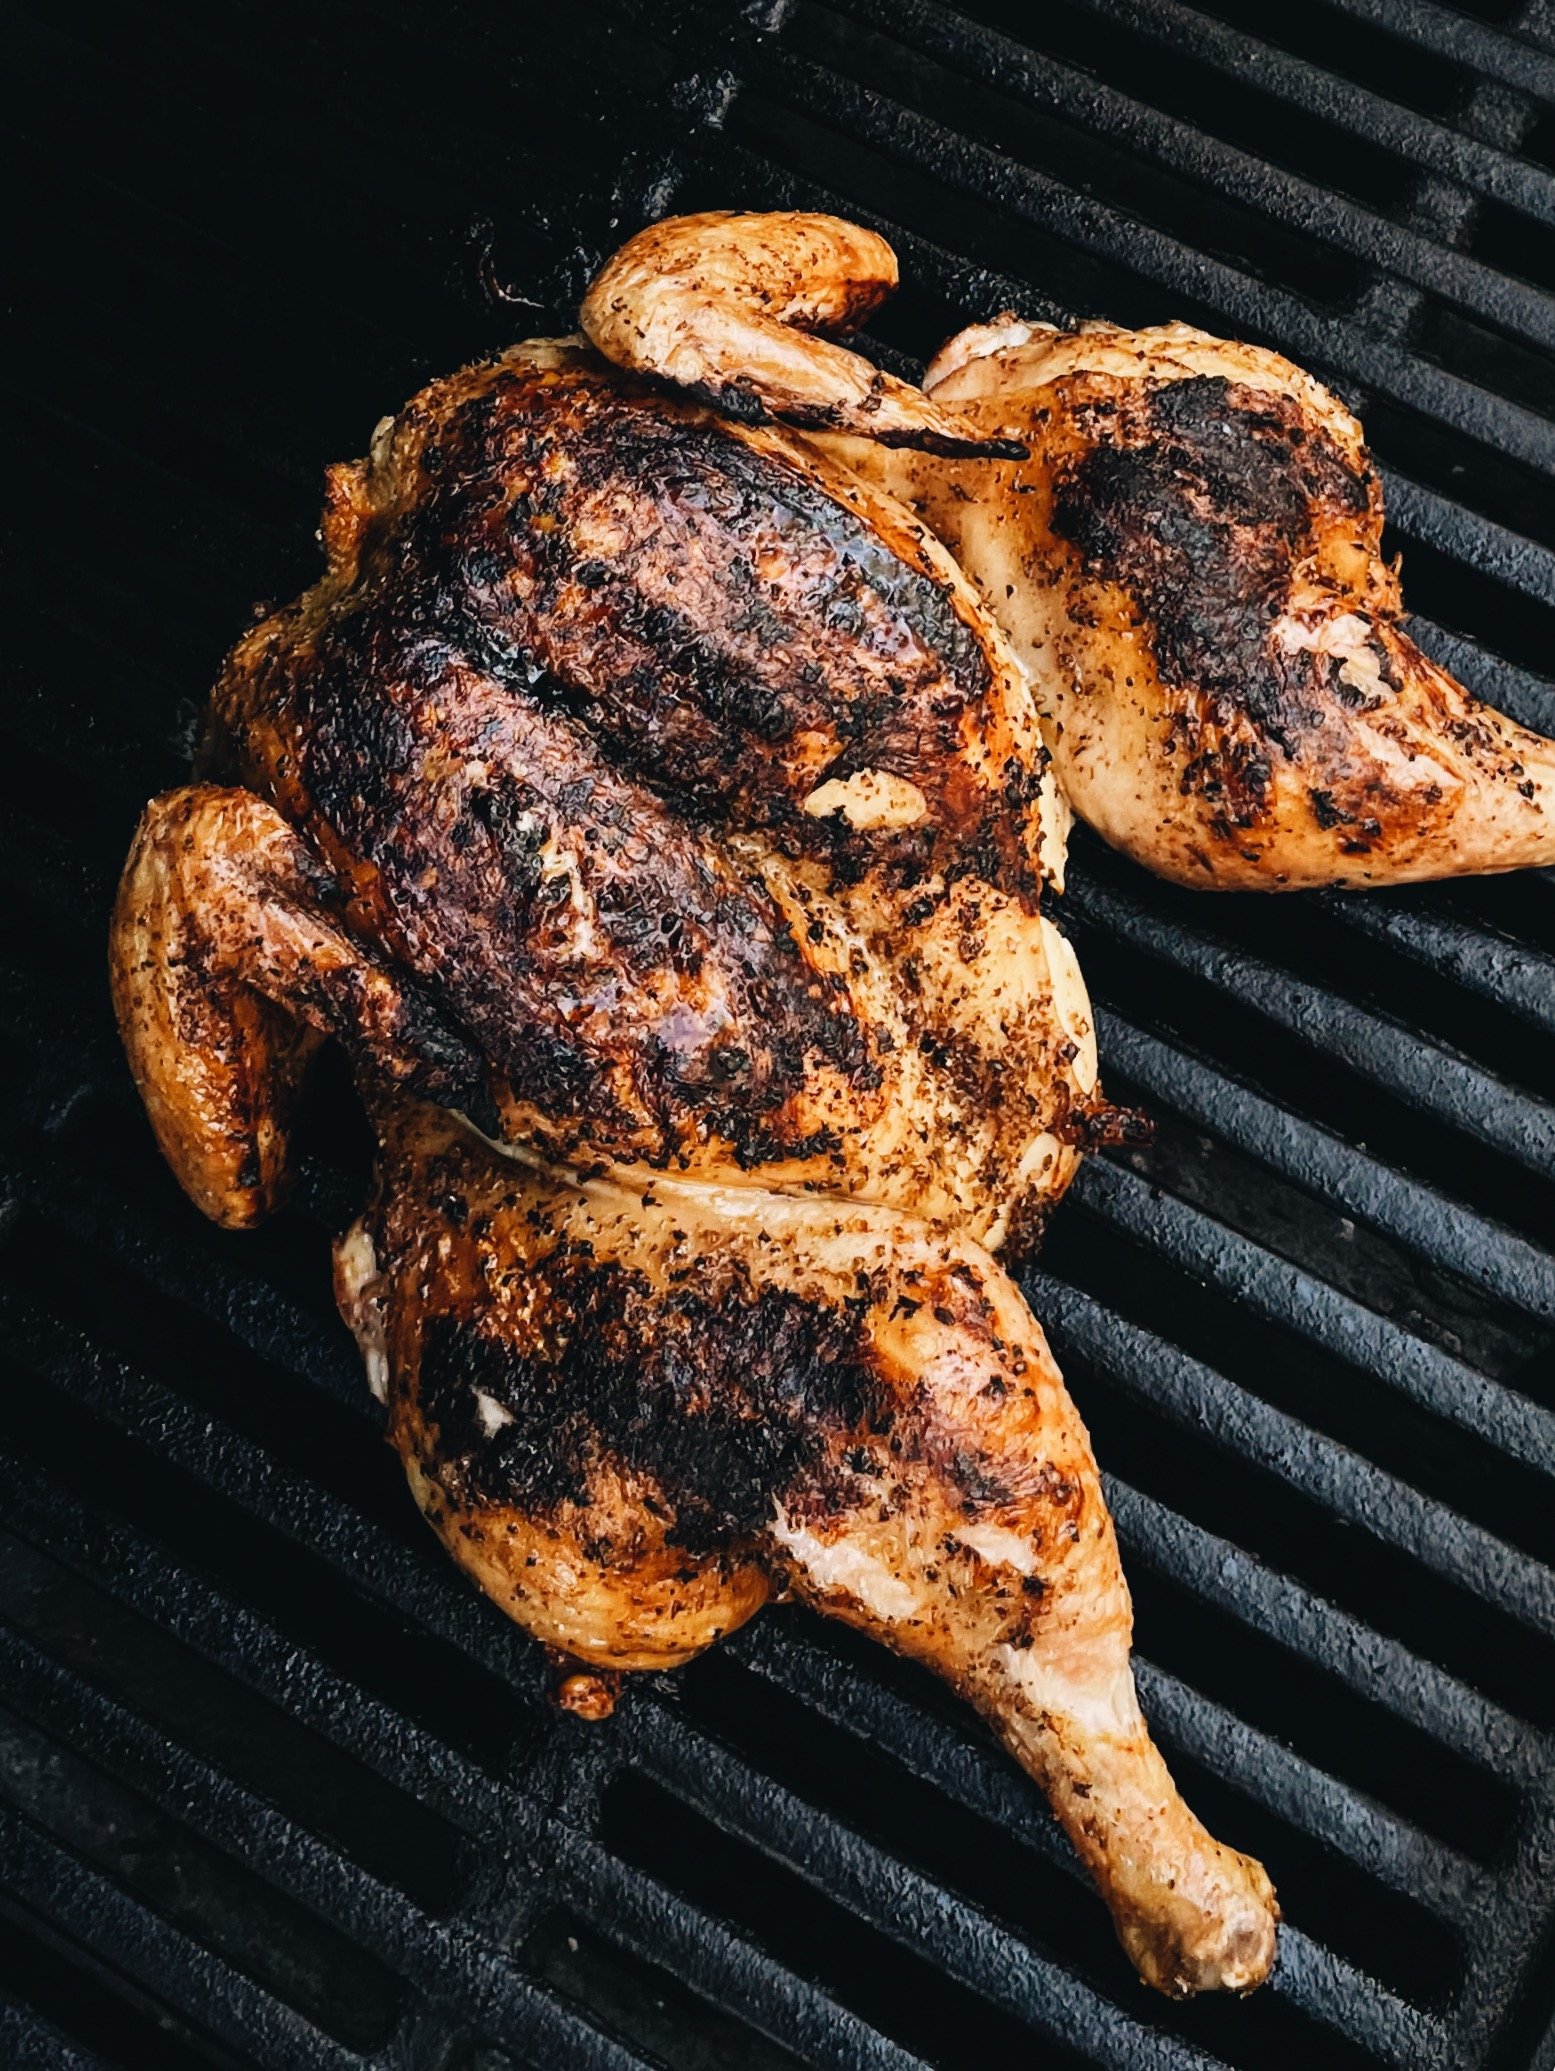
Once your grill is hot, plop that thing skin-side down on well-oiled grates, as flat as possible, on high heat. Leave it there for 5 minutes. The easiest way to get it flat is to kind of tuck the wings back and splay out the legs so that they appear to be in a power squat pose. It’ll make more sense when you try it.
Turn it over (at which point you should see very crispy exciting skin!) and lower the heat to low. We use the lowest gas knob notches on the Weber for this. Cook for another 35-45 minutes or until an instant-read thermometer has the breasts at 160ºF and the thighs are close to 180ºF. This, in my experience, tends to happen right around the same time.
The reason this works so well, and with such minimal margin for error, is because removing the backbone allows the chicken to spread out flat over a larger, more even surface area than a whole chicken would normally cook at in the oven. The slow-grilling acts as sort of a dry braise, and even the breasts come out pull-apart tender. Becauses thighs and legs can take a lot more heat and be at a much higher temp before drying out (I argue this actually improves them, since more of the fat renders), you almost always get perfect results in a relatively consistent amount of time.
One tip: don’t oil the chicken before you put it on. The skin already has a lot of fat in it, and adding extra oil to it can cause massive flare-ups—ask me how we know!—that you actually don’t need for a really crispy end product. Just oil the grates and let the chicken take care of itself. It is basically grilled chicken confit. It is amazing. I will be enjoying it all summer on Sundays between 6:45 and 7pm because that’s how much of a science I have it down to in my weekly routine. Try it and join me in the paradise of the spatchcock light!!!!

(NON) RECIPE
The very best thing you can do with a whole chicken this summer: spatchcock it, sear it hard til the skin is ultra crispy, and then slow-grill it until fall-apart tender.
Effortful time: 10 minutes
Total time: 1 hour 20 minutes
Makes about 8 servings in my house
you need
For the chicken
A 3-4 lb. chicken, spatchcocked and cleaned
A liberal amount of salt
3-4 tbsp. of your favorite seasoning blend
Some oil for brushing your grill grates
For serving
I like a spread, a starch, a green, and a citrus with this chicken. Here are some ideas:
Salsa and guac, a pot of cilantro-lime rice or tortillas, grilled scallions or leeks, lime wedges
Hummus, flatbread, a simple green salad, garlic sauce, grilled lemon halves
Tzatziki, cucumber-tomato-herb salad, pita pockets, lemon wedges
MAKE IT
Spatchcock the chicken unless you bought it that way, which I recommend if you don’t want to deal with it or are finding too many reasons why you can’t make this chicken. Here is a good tutorial if you need one.
Let the chicken warm up for 30 minutes at room temperature so you can get good crispy skin. I like to lay it on a quarter sheet pan, which is great for seasoning and transferring to the grill.
Heat the grill on high until it reaches about 500ºF. All grills vary, but we fire ours up after the chicken has been out for about 20 minutes. Brush and oil the grates so they are clean and shiny.
Salt, then zhuzh your chicken with seasoning. Salt very liberally, all over the skin side and underside. Arrange your chicken in a power squat stance, skin-side up, so that the wings are tucked and the legs are back—you want this to be as flat as you can make it, so play with it til it looks nice and level. Pour over a few tbsp. of your chosen seasoning blend and give it a 2-minute massage, really getting into all the skin and underneath where you can. Don’t overthink it.
Crisp the skin. Plop the chicken on the grill, skin-side down, and close the grill. Set a timer for 5 minutes. Now check the skin. It should look super crispy. If not, leave it on a minute or two longer (likely your chicken is still a little cold). IF IT STICKS: do not force it. Let it cook until it wants to lift. You’ll know.
Slow-grill it the rest of the way. Using a combination of tongs and a spatula, flip your chicken gently over so that it’s skin-side up. Lower all your burners to low, direct heat. Cover the grill again and leave it alone for 30 minutes. Temp check starting at 30 minutes. Your chicken should be 160ºF in the breasts, and close to 180ºF in the thighs and legs. Mine usually takes between 35-40 minutes, but my grill runs a little bit hot. An instant read thermometer is your friend.
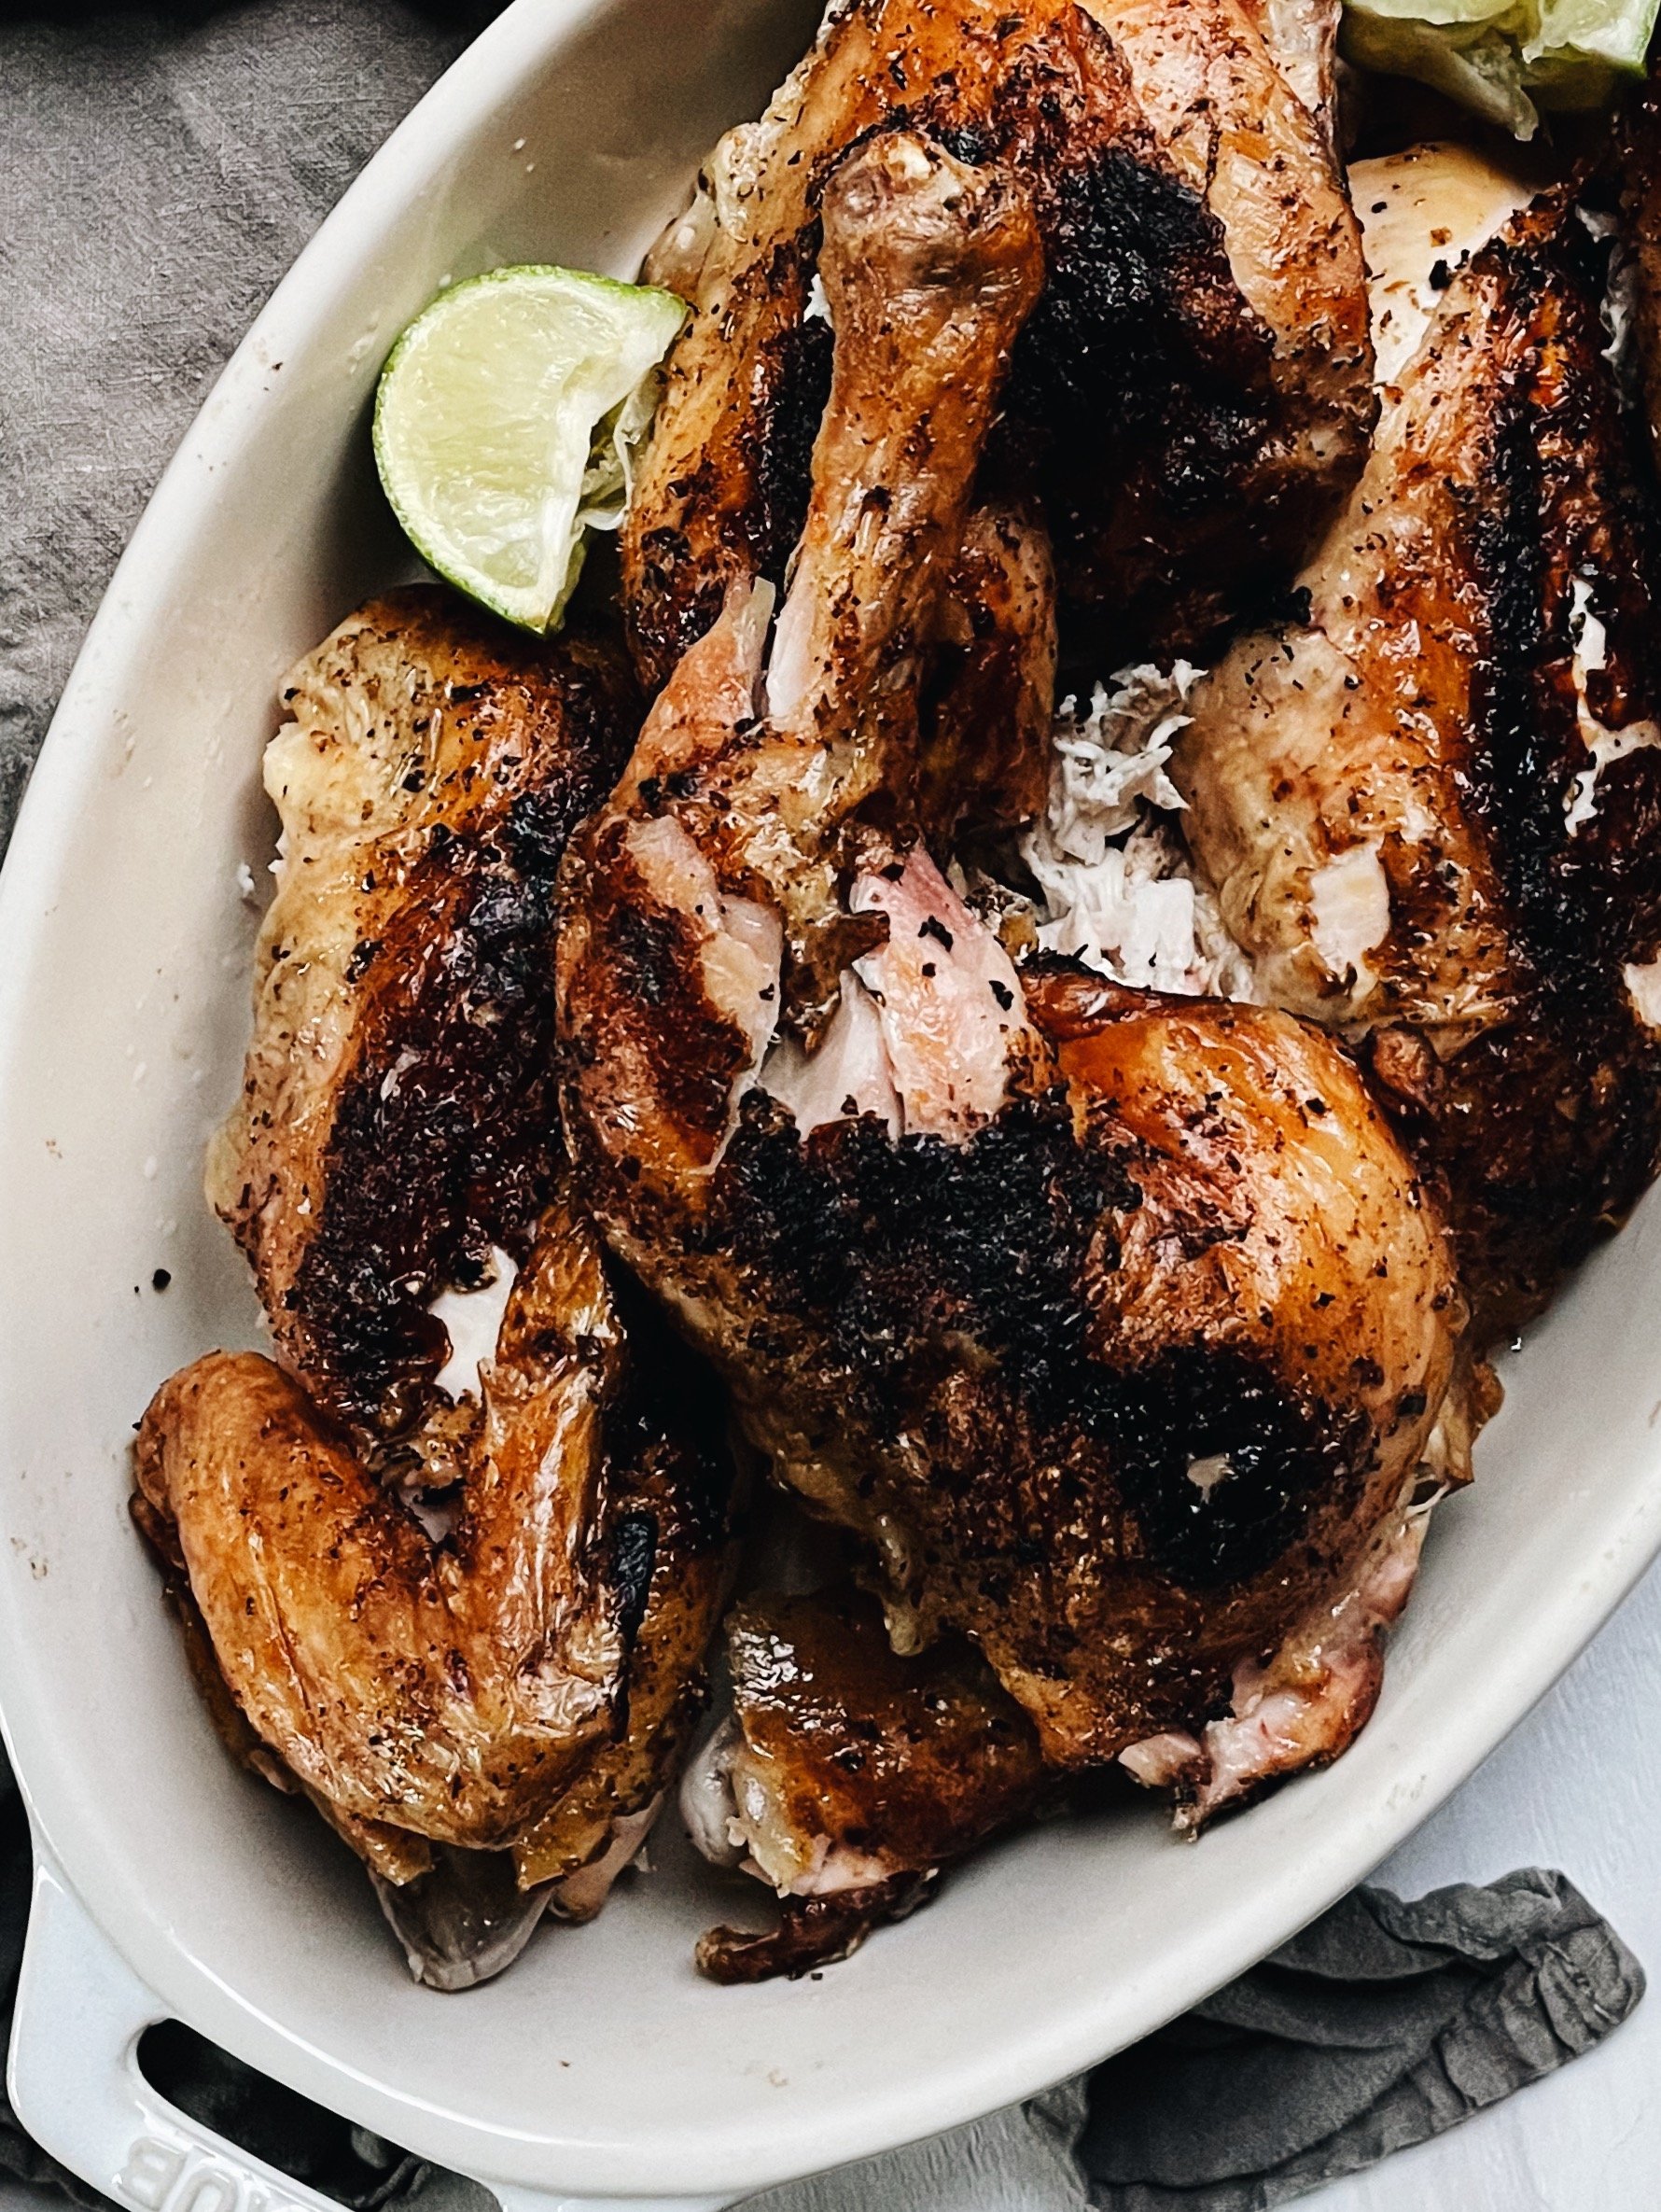
Rest the chicken. When it hits the right temp, pull it off the thermometer and let it rest for 5 minutes or so. While it hangs out, you can plate up any other sauces or sides you feel like having, or open a bottle of wine or whatever. Now carve your chicken. I can usually just pull apart the legs and wings, but get a sharp knife and carve off the breasts. Spritz with citrus if you feel like and serve it up.
Keeps well for 3-4 days in the fridge; I like to store it in large whole pieces in silicone bags and reheat it in my toaster oven on the “steam” setting before shredding for salads.